Turbocharge the Android emulator
Want to run the Android emulator on Mac OS X and NOT have to go make coffee while it starts up? Then read on…
It’s NOT slow, it’s just ‘thoughtful’
We’ve written before about our experiences with native app development in Always test on device and we moaned about the speed of the Android emulator when run on OS X, well we’ve had a play and found that there might just be something you can do that will help alleviate this situation!
Primarily the issue is down to the fact the emulator is trying to emulate an ARM processor (and hence run your actual application code) - and to do this, it’s dynamically translating to the OS and architecture of your development machine. Clearly that’s a lot of work and no wonder the poor thing is just so damned slow!
Tweak it gently …
You can actually make a small improvement to the standard emulator by changing one setting:
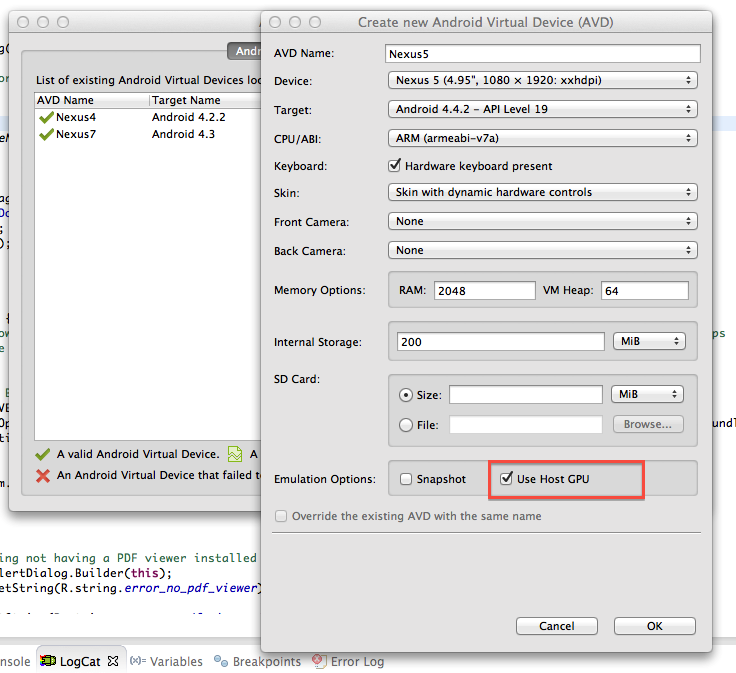
Make sure to check the option Use Host GPU within the Emulation Options box.
You’ll definitely be able to notice a small improvement in speed, not least with the standard Android transitions and animations, however this is still not really good enough is it?
Open the taps!
To really get things moving you need to do a bit of work - not much though, don’t go running off screaming!
What we need is the Intel Hardware Accelerated Execution Manager (Intel HAXM). It might be a mouthful, but this baby sure packs a punch! You can read more about using hardware acceleration if you like, and then follow on with the instructions below.
Note we’re basing these instructions around how we work, which is on Mac OS X with Eclipse.
Download and install Intel HAXM
In Eclipse, go into the Android SDK Manager, then under Extras ensure you check the Intel x86 Emulator Accelerator (HAXM) option, and while you’re in here, for the version(s) of the Android API you are working with, ensure you check the Intel x86 Atom System Image option:
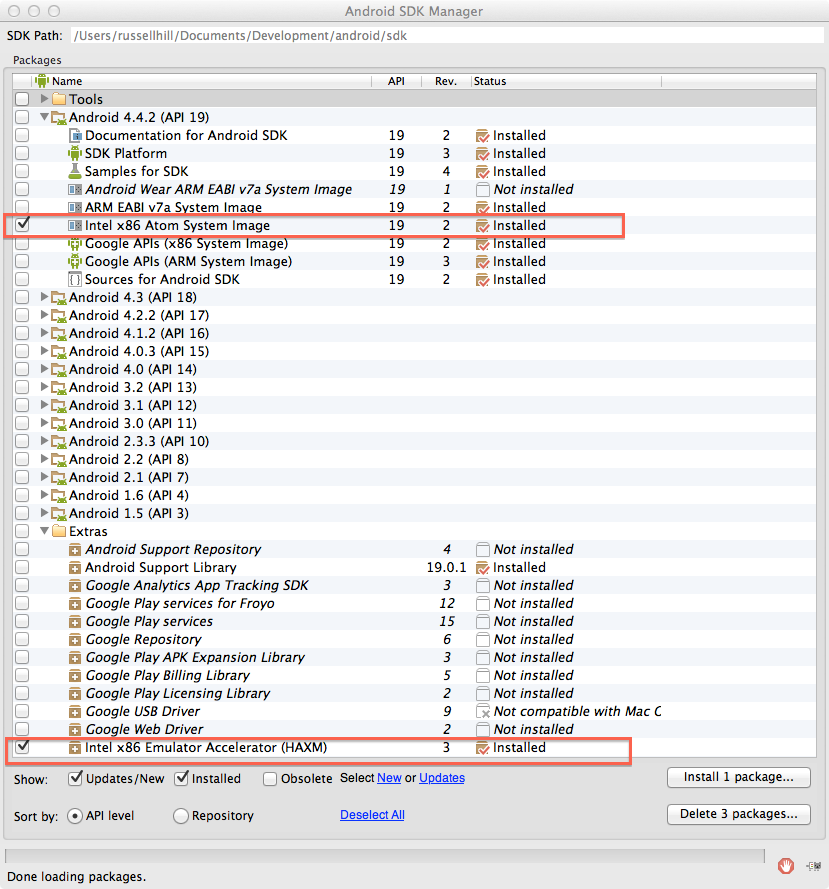
Then click the “Install nn package…” button and let it do its thing.
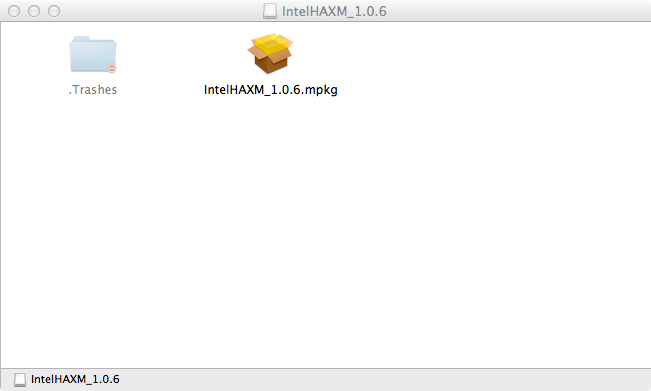
When it’s done, use Finder to go to wherever you installed the Android SDK originally and double-click the .dmg found in this location:
<sdk>/extras/intel/Hardware_Accelerated_Execution_Manager/IntelHAXM.dmgThen double click the IntelHAXM_(version).mpkg icon to begin installation:
Follow the on-screen instructions. When complete you just need to validate that everything got installed ok, so go to a terminal window and type:
kextstat | grep intelYou should see it respond with something along the lines of:
com.intel.kext.intelhaxmIf you see that, you’re all done with this step!
Create an Intel-based virtual device
Now it’s time to setup a new virtual device that uses the Intel chipset and hence the HAXM emulator accelerator. In Eclipse, head back into the Android Virtual Device Manager and click “New…” to start creating a new virtual device:
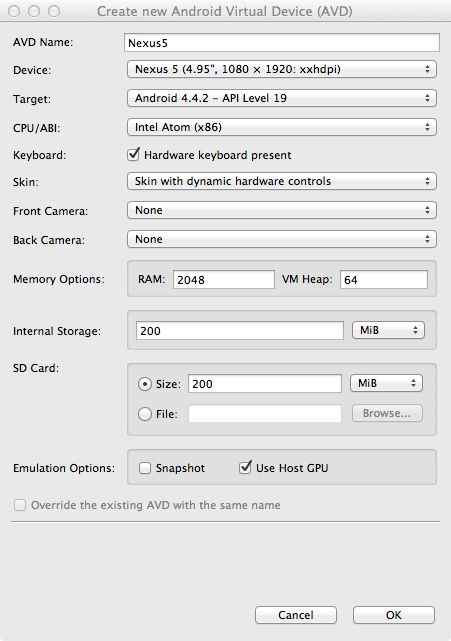
You’ll need to set:
- AVD Name: use an appropriate name (without spaces or special characters!)
- Device: select a device from the list
- Target: choose the API level you are building for
- CPU/ABI: this is where you can select the “Intel Atom (x86) CPU”
- Emulation Options: ensure “Use Host GPU” is selected to make animations and so on buttery smooth
- set other options such as Skin, Memory and SD Card as you see fit, based on your needs
Then click “OK” to create the new virtual device.
Setup your project run configuration
Next you can setup your project run configuration to select and launch the AVD you just created.
Click on your project folder in Eclipse, then select Run > Run Configurations…
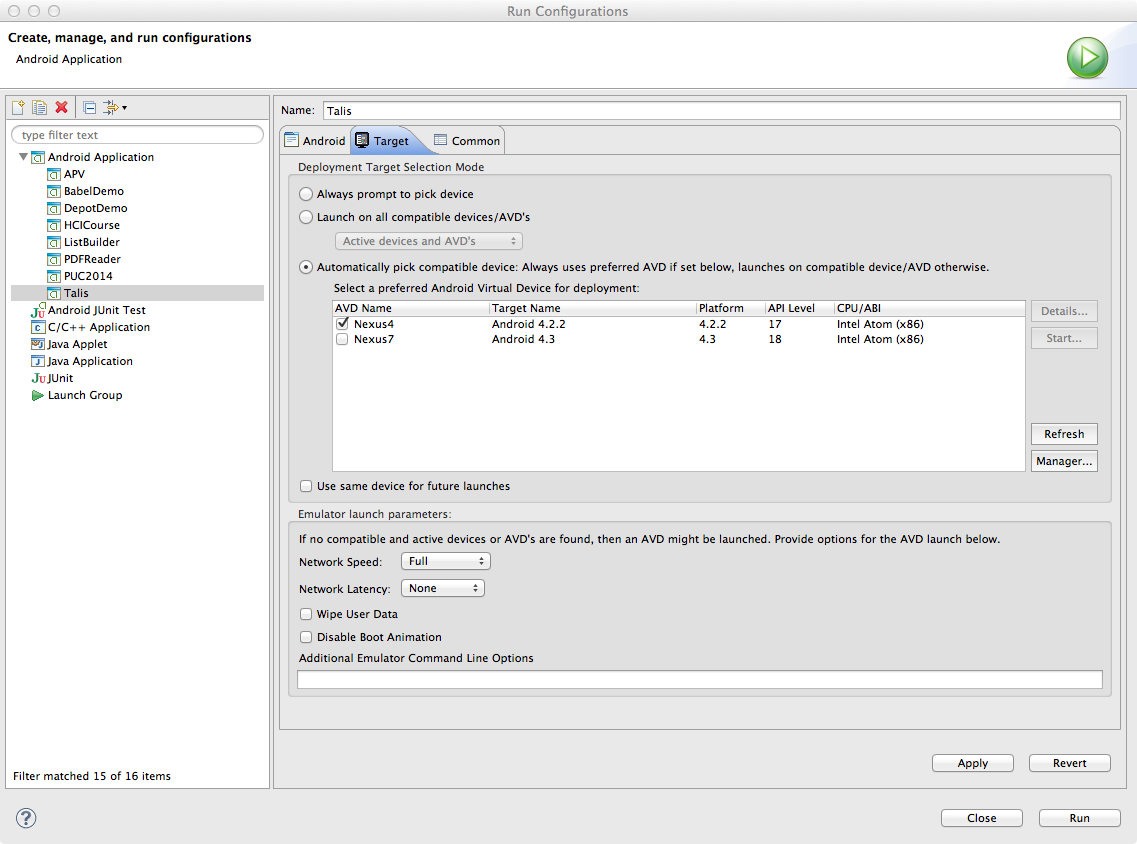
In the left panel of the Run Configurations dialog, select your Android project run configuration or create a new configuration. Then click the Target tab. Here you can select the x86-based AVD you created previously.
Now you can run your Android project using this run configuration!
You should see a message in the Console log in Eclipse that indicates the emulator is using HAX.

And here’s the result, the emulator running!
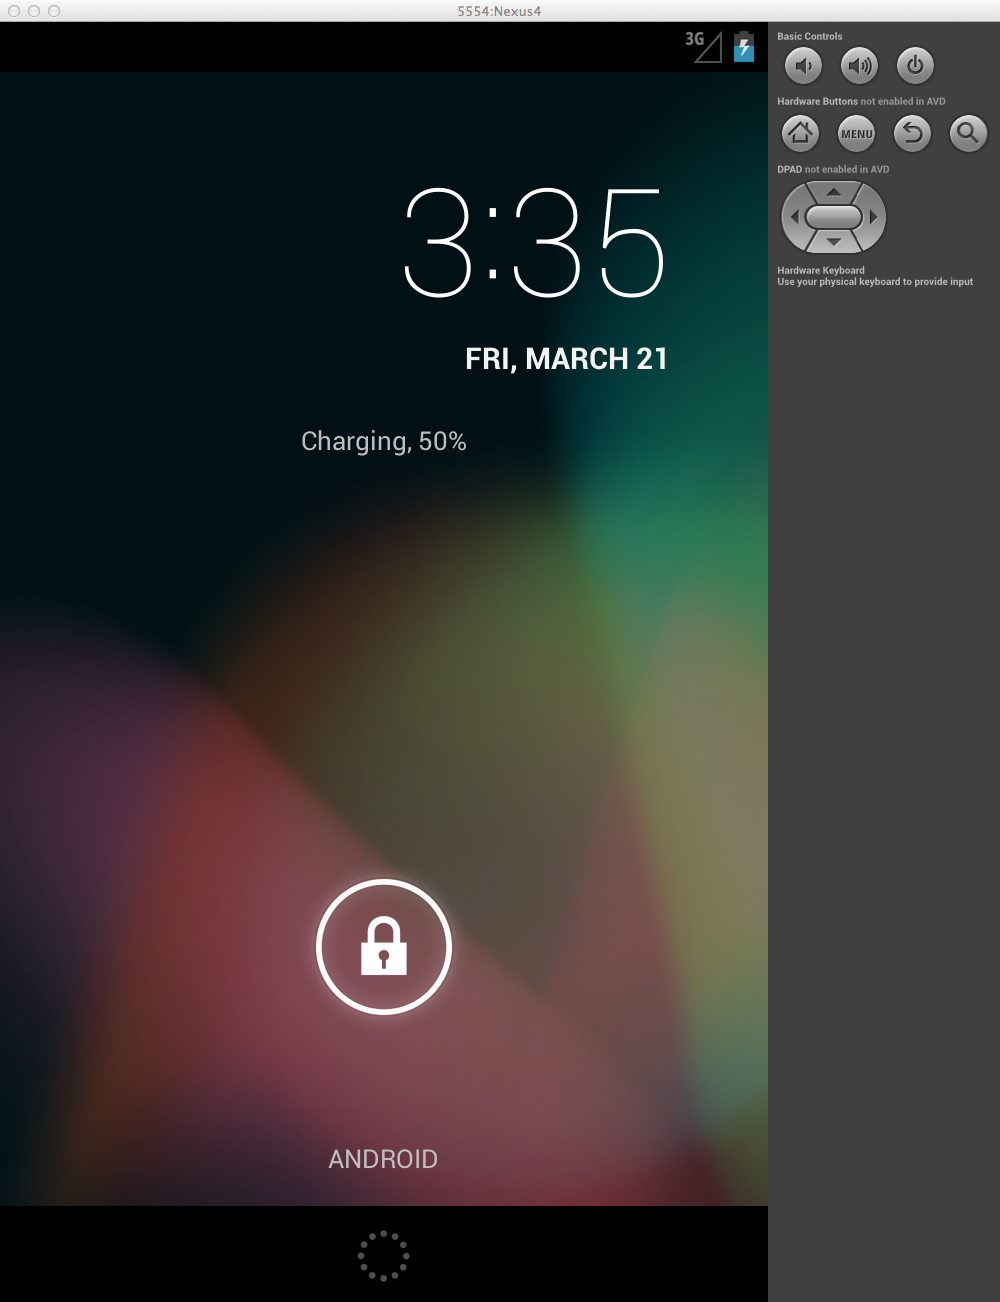
The emulator startup time is much reduced, the Android animations and transitions are faster and smoother and it’s quicker to launch your app.
Wrap up
Well, there you have it, a few simple steps to get your emulated Android apps running quicker during development. It’s a big jump forward in performance and hence productivity - get those apps built and tested faster!
It’s always good to use real hardware to test, but with the emulator you can create many more virtual devices that have different hardware configurations in order to test your app on different screen sizes - all without having to buy more phones and tablets.
That’s got to be good for the bottom-line too, right?